Welcome to the Crosley Record Player Manual! This guide provides essential information for setting up, operating, and maintaining your Crosley record player. It covers safety, features, and troubleshooting to ensure optimal performance and longevity. Read carefully to make the most of your vinyl listening experience.
1.1 Overview of Crosley Record Players
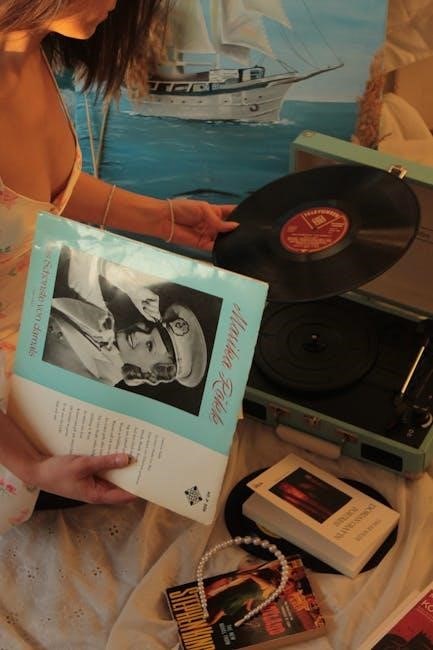
Crosley record players are renowned for their blend of vintage aesthetics and modern functionality, offering a nostalgic yet high-quality vinyl listening experience. Models like the Voyager, Cruiser, and Deluxe cater to diverse preferences, featuring Bluetooth connectivity, portability, and compatibility with 33 1/3 and 45 RPM records. Their user-friendly designs, durable construction, and included accessories ensure seamless operation for both casual and dedicated vinyl enthusiasts.
1.2 Importance of Reading the Manual
Reading the Crosley record player manual is essential for safe operation, optimal performance, and troubleshooting. It provides detailed setup instructions, maintenance tips, and guidelines for resolving common issues. Understanding the manual ensures proper assembly, prevents damage, and enhances your vinyl listening experience. Regularly reviewing the manual helps you make the most of your Crosley record player’s features and longevity.
Safety Precautions
Ensure safe operation by avoiding water exposure, using original power adaptors, and handling the record player gently. Follow all warnings and guidelines in this manual carefully.
2.1 General Safety Guidelines
Always read and follow the instructions in this manual carefully. Keep the Crosley Record Player away from water and moisture to avoid electric shock or damage. Use only the original power adaptor provided to ensure safe operation. Handle the record player with care, avoiding drops or excessive force. Regularly inspect cords and connectors for damage. Never operate the device near open flames or sparks. Ensure proper ventilation to prevent overheating.
2.2 Electrical Safety Tips
Use the Crosley Record Player only with the supplied power adapter to prevent electrical hazards. Avoid overloading circuits and keep cords away from water. Never modify or tamper with the unit or its components. Ensure all electrical connections are secure and free from damage. Unplug the device during cleaning or when not in use to maintain safety standards and protect against power surges.
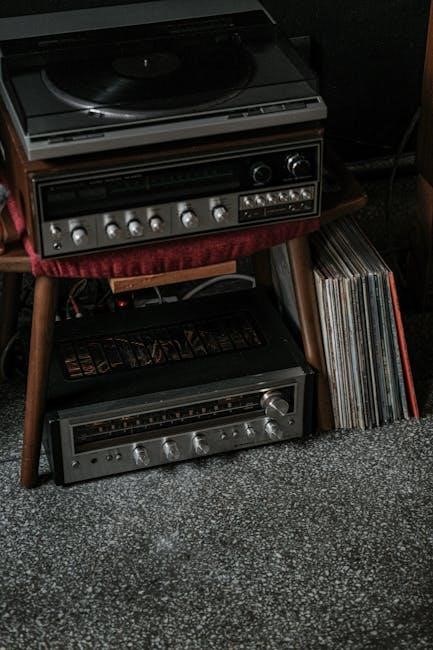
Understanding the Components
Familiarize yourself with the external and internal parts of your Crosley record player. External components include the turntable platter, tonearm, and slip mat, while internal parts like the motor and preamp ensure smooth operation; Understanding these elements is key to proper setup and maintenance.
3.1 External Components of the Record Player
The Crosley record player features several key external components. The turntable platter holds the record, while the slip mat protects it from scratches. The tonearm with a headshell and stylus reads the grooves. Additional parts like the counterweight ensure proper tracking. Understanding these elements is crucial for optimal performance and maintenance. Regular cleaning and inspection of these components will extend the life of your record player.
3.2 Internal Components and Their Functions
The internal components of your Crosley record player include the motor, which drives the turntable, and the belt, which ensures smooth rotation. The electronic circuits handle audio processing and Bluetooth connectivity. Additionally, the phono preamp amplifies the audio signal for external speakers. These components work together to deliver high-quality sound and reliable performance. Proper care and maintenance of these internals are essential for longevity and optimal function.
Setting Up Your Crosley Record Player
Unpack and inventory all accessories, then install the turntable lid and tonearm. Place the record player on a flat surface, ensuring proper alignment and balance for optimal performance.
4.1 Unpacking and Inventory of Accessories
Begin by carefully unpacking your Crosley record player and verifying all included accessories. Ensure you have the turntable platter, slip mat, 45 RPM adapter, power adapter, and user manual. Check for any missing or damaged items. If anything is missing, contact Crosley customer service immediately. Properly organize the components to prepare for assembly and setup, ensuring a smooth installation process.
4.2 Step-by-Step Assembly Instructions
Attach the turntable lid to the hinges and remove the tie-wrap holding the tonearm. Install the turntable platter and drive belt accordingly. Place the slip mat on the platter and ensure the tonearm is securely positioned. Follow the manual for proper alignment and balance. Once assembled, plug in the power adapter and test the turntable to ensure smooth operation before playing your records.

Operating the Record Player
Place the record on the turntable and secure it with the 45 RPM adapter if needed. Use the cue lever to gently lower the tonearm onto the record. Adjust the volume knob to your preferred listening level for optimal sound quality.
5.1 Playing 33 1/3 and 45 RPM Records
To play a 33 1/3 RPM record, place it directly on the turntable. For 45 RPM records, attach the 45 RPM adapter to the spindle. Ensure the speed switch matches the record speed. Gently lift the tonearm using the cue lever and lower it onto the record’s edge. Adjust the volume knob to achieve your desired sound level for an optimal listening experience.
5.2 Adjusting the Tonearm and Stylus
Adjust the tonearm by gently pulling it to the right until it clicks, ensuring proper balance. Clean the stylus with a soft brush to remove dust. Align the tonearm over the record groove and lower it gently. Ensure the counterweight is set correctly for optimal playback quality and to prevent damage to your records or the stylus.
Bluetooth Connectivity
Enable Bluetooth mode on your Crosley record player and pair it with your device. Once connected, enjoy wireless audio streaming effortlessly, enhancing your vinyl listening experience.
6.1 Pairing Your Device with the Crosley Record Player
To pair your device, switch the Crosley record player to Bluetooth mode. You’ll hear an activation sound. On your device, enable Bluetooth and search for “Crosley CR8005D” or similar model name. Select it to establish a connection. Once paired, a confirmation sound will play. Ensure your device stays within range for uninterrupted wireless audio streaming. Use the tonearm controls to manage playback seamlessly.
6.2 Troubleshooting Bluetooth Connections
If your Bluetooth connection is unstable, restart both the Crosley record player and your device. Ensure Bluetooth mode is activated on the player and your device is within range. Check for interference from nearby devices. If pairing fails, reset the player by turning it off, then on again. Re-attempt pairing to establish a stable connection for uninterrupted audio playback.
Maintenance and Care
Regularly clean the turntable, stylus, and records with a soft brush and mild solution. Store the player in a dry, cool place to prevent damage and ensure optimal performance.
7.1 Cleaning the Turntable and Records
Regular cleaning is essential for maintaining sound quality. Use a soft, dry brush to remove dust from the turntable and records. For deeper cleaning, dampen a microfiber cloth with distilled water or a mild cleaning solution. Gently wipe the turntable surface and records, avoiding harsh chemicals. Clean the stylus with a specialized brush to prevent dust buildup and ensure optimal playback performance.
7.2 Storing the Record Player and Accessories
Store your Crosley record player in a cool, dry place to protect it from dust and moisture. Keep the turntable covered when not in use to prevent debris buildup. Store records upright in a dry area to maintain their condition. Securely store accessories like the stylus, adapters, and cables in their original packaging or a protective case to prevent damage or loss.
Troubleshooting Common Issues
Identify common problems like skipping tracks or no sound. Check connections, ensure the stylus is clean, and verify motor settings. Consult the manual for solutions.
8.1 Diagnosing Common Problems
Start by checking power connections and ensuring the record player is turned on. Inspect the stylus for damage and clean it gently. Verify the motor is functioning and the belt is properly aligned. For Bluetooth issues, restart the device and ensure pairing is correct. Consult the manual for detailed troubleshooting steps and solutions to common playback problems.
8.2 Resetting the Record Player
To reset your Crosley record player, power it off and unplug it. Press and hold the power button for 10 seconds to discharge residual power. Plug it back in and turn it on. This process resets the system to default settings. For Bluetooth models, restart the device and pair it again if necessary. This ensures proper functionality and resolves connectivity issues effectively.
Accessories and Upgrades
Discover essential accessories like record cleaning kits, turntable mats, and 45 RPM adapters to enhance your Crosley record player experience. Consider upgrades such as a phono preamp or upgraded speakers for improved sound quality. Visit the Crosley website or authorized retailers to explore compatible accessories and upgrades tailored to your model.
9.1 Recommended Accessories for Enhanced Performance
To elevate your Crosley record player experience, consider essential accessories like a record cleaning kit for maintaining vinyl, a turntable mat for reduced friction, and a 45 RPM adapter for playing smaller records. Additionally, a phono preamp can enhance sound quality if your setup lacks one. These accessories ensure optimal performance and longevity for your record player, enhancing both sound and functionality.
9.2 Upgrading Your Record Player
Upgrading your Crosley record player can enhance its performance and sound quality. Consider replacing the stylus or cartridge for better audio fidelity. You can also upgrade the phono preamp or speakers for improved sound output. Additionally, upgrading the tonearm or belt can improve tracking and reduce vibrations. Always ensure compatibility with your Crosley model for seamless integration.
Warranty and Customer Support
This section covers your Crosley record player’s warranty details, customer support contact information, and how to address any issues or concerns. Keep your manual for future reference.
10.1 Understanding Your Warranty
Your Crosley record player is backed by a limited warranty covering manufacturing defects for a specified period. This warranty ensures repairs or replacements for faulty parts under normal use. Keep your purchase receipt and manual as proof of ownership. For details, visit Crosley’s official website or contact customer support. Proper maintenance is essential to uphold warranty validity.
10.2 Contacting Crosley Customer Service
For assistance with your Crosley record player, visit the official Crosley website or call 1-888-CROSLEY. Customer service is available to address warranty claims, repairs, or general inquiries. Ensure you have your model number and purchase details ready for efficient support. Additionally, Crosley’s website offers online resources and FAQs to help resolve common issues quickly.
Advanced Features
Explore advanced features like built-in phono preamps, Bluetooth connectivity, and external speaker compatibility. These enhancements allow for customizable listening experiences and seamless integration with modern audio systems.
11.1 Using the Built-In Phono Preamp
The built-in phono preamp allows direct connection to amplifiers or stereos without an external preamp. Simply enable the preamp via the switch, typically located near the RCA outputs. This feature ensures high-quality audio signal transmission, enhancing your vinyl listening experience with clarity and depth. Adjust settings as needed for optimal sound reproduction.
11;2 Connecting to External Speakers
To connect external speakers, locate the RCA output ports on your Crosley record player. Attach RCA cables to these ports and connect the other ends to your external speakers’ input jacks. Ensure both devices are powered on. Adjust the volume using the record player’s controls and fine-tune with the speakers’ volume knob for balanced sound. This setup optimizes audio quality and enhances your listening experience.

Tips for Optimal Performance
Optimize your Crosley record player’s performance by cleaning the turntable and records regularly, using the correct RPM setting for your vinyl, and ensuring proper stylus alignment. Proper care enhances sound quality and prolongs the life of your records and player.
12.1 Choosing the Right Records
Ensure optimal playback by selecting records compatible with your Crosley player’s RPM settings. Choose high-quality vinyl in excellent condition to minimize surface noise. Clean records before playback to prevent dust and debris from affecting sound quality. Handle records by the edges to avoid fingerprints and damage. Proper record selection and care enhance your listening experience and protect your collection.
12.2 Adjusting the Counterweight for Optimal Playback
Properly balancing the tonearm by adjusting the counterweight ensures accurate tracking and clear sound. Start with the counterweight fully inward, then gently turn it outward until the tonearm balances evenly. Use a small screwdriver to fine-tune the weight for optimal playback. This adjustment prevents scratching records and enhances audio quality, ensuring your Crosley record player performs at its best;
With proper setup, care, and use, your Crosley record player will provide years of enjoyable vinyl listening. Follow the manual for optimal playback and maintenance.
13.1 Final Thoughts on Using Your Crosley Record Player
Using your Crosley record player is a rewarding experience that combines nostalgia with modern convenience. By following the manual, you ensure optimal performance and longevity. Regular maintenance, proper record care, and adherence to safety guidelines will enhance your vinyl journey. Enjoy the rich sound and timeless charm of your Crosley record player for years to come.